当前位置:
首页 > Python基础教程 >
-
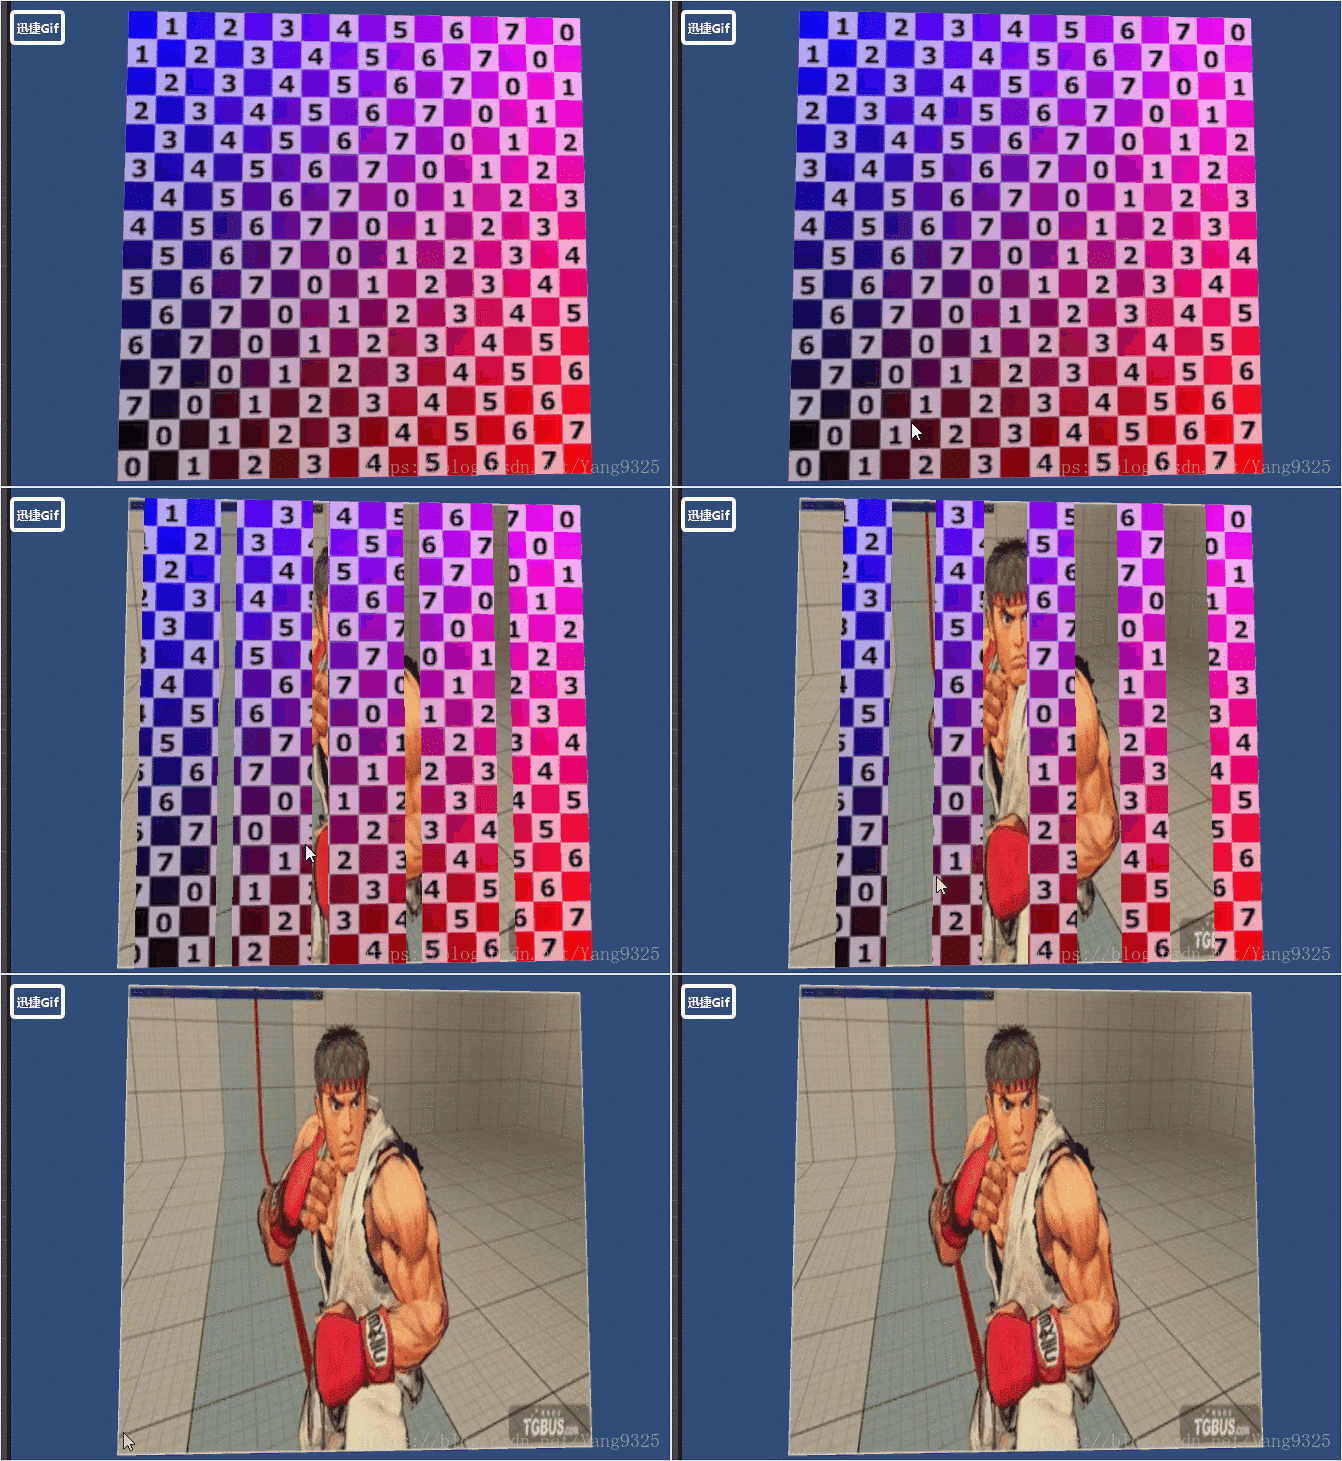
UnityShader实现百叶窗效果
本文实例为大家分享了UnityShader百叶窗展示的具体代码,供大家参考,具体内容如下

shader实现以上百叶窗效果,主要通过shader实现C#只是做开关控制
看到一篇文章弄的比较复杂,觉得可以都通过shader来实现,就动手了。
shader定义了2张texture,自己随便找2张图片拖进去就行。
|
1
2
3
4
5
6
7
8
9
10
11
12
13
14
15
16
17
18
19
20
21
22
23
24
25
26
27
28
29
30
31
32
33
34
35
36
37
38
39
40
41
42
43
44
45
46
47
48
49
50
51
52
53
54
55
56
57
58
59
60
61
62
63
64
65
66
67
68
69
70
71
72
73
74
75
76
77
78
79
80
|
Shader "Unlit/NewUnlitShader"{ Properties { _MainTex ("Texture", 2D) = "white" {} _MainTex2 ("Texture2", 2D) = "white" {} _StartFlag("开始标记", float) = 0 _SpeedFactor("速度",Range(0.01,10)) = 0.1 _StartTime("时间初始标记,不要手动设置",float) = 1 _Column("百叶窗的列数",float ) = 5 } SubShader { Tags { "RenderType"="Opaque" } LOD 100 Pass { CGPROGRAM #pragma vertex vert #pragma fragment frag // make fog work #pragma multi_compile_fog #include "UnityCG.cginc" struct appdata { float4 vertex : POSITION; float2 uv : TEXCOORD0; }; struct v2f { float2 uv : TEXCOORD0; float4 vertex : SV_POSITION; }; sampler2D _MainTex; float4 _MainTex_ST; sampler2D _MainTex2; float4 _MainTex2_ST; float _StartFlag; float _Column; float _SpeedFactor; float _StartTime; v2f vert (appdata v) { v2f o; o.vertex = UnityObjectToClipPos(v.vertex); o.uv = TRANSFORM_TEX(v.uv, _MainTex); return o; } fixed4 frag (v2f i) : SV_Target { fixed4 col = 0; //_StartFlag 通过C#监听键盘事件,设置为1,作为开始动画的标记 //step(a,b) => if(b>=a) return 1 else return 0 //i.uv.x % (1/_Column) i.uv.x范围是0-1,分成_Column份 每份(1/_Column) fixed result = _StartFlag * step( i.uv.x % (1/_Column) ,(_Time.y - _StartTime) * _SpeedFactor ); if( result == 0 ) { col = tex2D(_MainTex, i.uv); } else { col = tex2D(_MainTex2, i.uv); } return col; } ENDCG } }} |
C#控制开关,点击键盘任意按键。挂到panel上
|
1
2
3
4
5
6
7
8
9
10
11
12
13
14
15
16
17
18
19
20
21
22
23
24
25
26
27
28
29
30
31
32
33
34
35
36
|
using System.Collections;using System.Collections.Generic;using UnityEngine; public class baiyechuang : MonoBehaviour { // Use this for initialization Material mat; MeshRenderer meshRen; void Start () { meshRen = this.GetComponent<MeshRenderer> (); print (meshRen); mat = meshRen.material; print (mat); } void OnGUI() { if (Input.anyKeyDown) { Event e = Event.current; if (e.isMouse) { Debug.Log(e.button); } if (e.isKey) { if (e.keyCode == KeyCode.None) return; Debug.Log(e.keyCode); mat.SetFloat ("_StartTime", Time.timeSinceLevelLoad); mat.SetFloat ("_StartFlag", 1); } } } } |
以上就是本文的全部内容,希望对大家的学习有所帮助,也希望大家多多支持脚本之家。
栏目列表
最新更新
nodejs爬虫
Python正则表达式完全指南
爬取豆瓣Top250图书数据
shp 地图文件批量添加字段
爬虫小试牛刀(爬取学校通知公告)
【python基础】函数-初识函数
【python基础】函数-返回值
HTTP请求:requests模块基础使用必知必会
Python初学者友好丨详解参数传递类型
如何有效管理爬虫流量?
SQL SERVER中递归
2个场景实例讲解GaussDB(DWS)基表统计信息估
常用的 SQL Server 关键字及其含义
动手分析SQL Server中的事务中使用的锁
openGauss内核分析:SQL by pass & 经典执行
一招教你如何高效批量导入与更新数据
天天写SQL,这些神奇的特性你知道吗?
openGauss内核分析:执行计划生成
[IM002]Navicat ODBC驱动器管理器 未发现数据
初入Sql Server 之 存储过程的简单使用
这是目前我见过最好的跨域解决方案!
减少回流与重绘
减少回流与重绘
如何使用KrpanoToolJS在浏览器切图
performance.now() 与 Date.now() 对比
一款纯 JS 实现的轻量化图片编辑器
关于开发 VS Code 插件遇到的 workbench.scm.
前端设计模式——观察者模式
前端设计模式——中介者模式
创建型-原型模式


